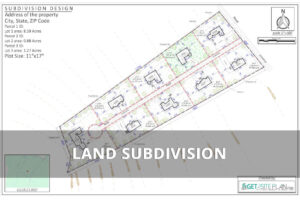
Land Subdivision – What It Is, Process, Types, and Cost
Land subdivision is the process of dividing a single piece of land into smaller parcels, or lots, that can be sold or developed individually. It’s a common practice in real


A rejected permit application doesn’t just mean more paperwork.
In Washington State, every delay in the permitting process adds an estimated $31,000+ in carrying costs to a project – and that figure is specific to Washington alone [1]. In high-demand markets like San Francisco, the median permitting timeline already stretches to 33 months before a single correction enters the picture [2].
Yet, most rejections are caused by preventable errors: missing dimensions, incorrect scale, unlabeled boundaries. The kind of mistakes a reviewer catches in the first ten minutes. This guide covers the 7 most common site plan and plot plan mistakes that send permit applications back – and what to do instead.

Government regulations already add an average of 23.8% to the final price of a new home – roughly $93,870 per unit as of 2021, according to the National Association of Home Builders (NAHB) [3].
According to the same statistics, nearly 96% of developers report that regulatory compliance adds an average of six months to the development timeline before construction begins.
With nearly 1.5 million permits issued in 2024 alone, the permitting system is under real pressure [4]. A correction notice means a new review cycle, additional fees, and a longer position in a queue that’s already stretched.
NAHB’s 2024 cost breakdown shows that regulatory site work (permit fees, architecture and engineering, water/sewer inspections, and impact fees) adds up to $26,747 before construction begins on a typical single-family home [5]. Every resubmission adds to that number.
In cities like Los Angeles, the median permitting timeline is 13 months. In San Francisco and New York, it stretches to 33 and 30 months respectively (White House Council of Economic Advisers, 2024). A rejected site plan adds directly to whichever timeline applies to your project.

The good news: every one of those delays starts with a plan error – and plan errors are fixable before you file.

Before covering the specific mistakes, it helps to understand what permit reviewers are trying to accomplish. Their job isn’t to find reasons to reject plans but to verify that what’s proposed on paper matches what’s allowed under zoning ordinances, building codes, and local regulations.
A reviewer typically checks whether the plan is drawn to scale, whether dimensions match declared figures, whether setbacks comply with zoning requirements, and whether all elements required by the permit application are present and consistent. If any of these checks fail in the first pass, the plan is returned.
The consistent thread across every rejection: reviewers work from the plan as submitted. They don’t call to ask clarifying questions. If something is missing or inconsistent, the plan comes back.
Knowing that logic, the most common mistakes become easy to predict – and just as easy to prevent.
Failing to draw a site plan to scale (or drawing it to scale but forgetting to state the scale in the title block) is one of the most common reasons permit applications are returned.
Without a clearly stated scale bar and ratio (such as 1″ = 20′), a reviewer cannot visually verify that setbacks, dimensions, or lot coverage calculations are accurate. An unstated scale is effectively an unverifiable plan. This is why using Google Maps as a plot plan often fails during permit review: the image may show the property visually, but it does not provide a compliant scale, dimensions, or setback verification.
A reviewer uses the scale to cross-reference stated dimensions against what’s shown on the drawing. If you write “15-foot front setback” but the drawing doesn’t reflect that at the stated scale, the plan fails, regardless of whether your actual setback is compliant.
How to fix it: Always include both a scale bar and a written scale ratio on the plan. Both elements belong in the title block. If you’re submitting digitally, confirm that the file hasn’t been resized during PDF export – this is a frequent source of scale errors in electronic submissions that aren’t caught until review.
Whether your permit involves a deck, an ADU, or a home addition, scale accuracy is foundational. Everything else on the plan is measured against it.

Setbacks (the required distances between a structure and property lines) are among the first things a zoning reviewer checks. Front, rear, and side setback requirements vary by zone and by municipality.
If your plan doesn’t label all applicable setback dimensions, or if the dimensions shown don’t comply with your local zoning ordinance, the plan will be returned.
Why reviewers reject this: Zoning compliance can’t be confirmed without visible setback dimensions. Even if your structure is set back correctly on the ground, a plan that doesn’t show those dimensions forces the reviewer to make assumptions – which they won’t do.
How to fix it: Check your local zoning ordinance for all applicable setbacks before drawing. Label front, rear, and both side setbacks explicitly on the plan. If your parcel has additional setback requirements (corner lots, fire access corridors, drainage buffers) label those separately. Always confirm applicable setback requirements with your local building department before finalizing your plan, since requirements vary significantly by jurisdiction.

Property boundaries define the legal limits of your parcel and site plan review begins with them. If the boundaries shown on your plan don’t match recorded survey data, or if property lines are missing entirely, the reviewer has no framework to verify compliance with any setback, lot coverage, or easement requirement.
A common version of this mistake: using a rough sketch or GIS screenshot as the basis for a site plan instead of recorded survey dimensions. These sources often carry measurement discrepancies that compound across the rest of the plan.
Why reviewers reject this: Without accurate property lines, nothing else on the plan can be verified. Setback compliance, lot coverage calculations, and structure placement are all measured relative to boundaries.
How to fix it: Base your site plan on recorded survey dimensions for your parcel. Pull your legal description from your property deed or recorded plat, and confirm lot dimensions against those figures. If discrepancies exist between a GIS map and your recorded plat, the recorded plat controls — and what a site plan includes goes beyond boundaries alone.
A site plan for a new addition, accessory structure, or ADU must show not just the proposed structure, but all existing structures on the parcel. This includes the main dwelling, detached garages, sheds, driveways, and any other improvements.
Why reviewers reject this: Lot coverage (the percentage of the parcel covered by built surfaces) is a zoning compliance metric. Reviewers can’t calculate it without seeing every structure. A plan that omits existing buildings is treated as incomplete.
How to fix it: Walk the property and account for every structure before drawing. Include the accurate footprint (not just the location) of each one. Label each clearly: “existing house,” “existing garage,” “existing shed.”
If structures will be demolished as part of the project, note that explicitly on the plan — a site plan and a property survey serve different functions, and understanding site plan vs survey key differences prevents a common documentation mix-up at this stage.
Easements (recorded rights-of-way for utilities, drainage, or access) restrict where structures can be built.
A plan that doesn’t show existing easements will be rejected if the proposed structure appears to encroach on them, even if that encroachment wasn’t intentional. Missing utility connections (water, sewer, gas, electric service points) or undisclosed zoning overlays (flood zones, historic districts, special use areas) can independently trigger a rejection.
Why reviewers reject this: Building in an easement area creates liability and downstream compliance issues. A plan that doesn’t disclose known easements or overlay conditions signals an incomplete site analysis – and reviewers treat it accordingly.
How to fix it: Pull your title report or recorded plat to identify all easements, and contact local utility providers if service line locations aren’t in your records – these are also standard elements in a certified site plan submission.

Among all common site plan mistakes, missing stormwater and drainage documentation is the one most likely to cause rejection – at both local and federal level. New impervious surfaces alter a parcel’s drainage pattern, and building departments require documented evidence of how runoff will be managed. Without it, the application is incomplete regardless of everything else.
How to fix it:
Federal threshold (NPDES/CGP): If land disturbance reaches one acre or more, or is part of a larger development that will cumulatively disturb one acre, federal requirements apply regardless of local rules. The trigger is based on total project area, not individual phases. Refer to the EPA’s NPDES Construction Activities page for current CGP requirements.
Every element in your permit application should have a corresponding representation on the site plan. If your permit application describes a 600-square-foot addition but the site plan shows a footprint that calculates to 450 square feet, you have a consistency error – and it will be caught.
Why reviewers reject this: Permit reviewers compare the site plan against the application scope as a standard step. Discrepancies signal either measurement errors or incomplete documentation. Both result in a returned application.
How to fix it: Before submitting, cross-reference your permit application scope against every dimension and element shown on the site plan. Confirm that square footage calculations, structure dimensions, and project descriptions are consistent across all submitted documents.
This check is especially important when separate parties prepare the application and the site plan — which is exactly the scenario covered in How to Obtain a Site Plan for Your Property, from first documentation through submission.

In 2024, 981,911 single-family building permits were issued across the U.S. — a 6.7% year-over-year increase. Texas led all states with over 158,000 permits, followed by Florida and North Carolina. The top 10 states accounted for 63.1% of all single-family permits issued [5].
That volume means permitting infrastructure is under strain in high-growth markets — and the practical effect is that permit requirements vary significantly not just by state, but by municipality and by project type within the same jurisdiction.
Setback requirements in one Texas county may be entirely different from the county next door and the distinction between what a Plot Plan vs Site Plan must contain adds another layer of local variability that affects which document you actually need to submit.
The lesson: There is no national standard for site plan submission. Always verify requirements with your local building department before you draw — not after.
The checklist below consolidates the requirements that hold across virtually every jurisdiction – use it as your final verification step before you file.
Use this checklist before submitting any site plan for a building permit. Permit reviewers check all of these – so should you.
| # | Item | What to verify |
| 1 | Scale stated | Both as a ratio (e.g., 1″ = 20′) and as a scale bar on the drawing. |
| 2 | All setbacks labeled | Front, rear, and both sides — measured to the nearest property line per local zoning ordinance. |
| 3 | Property boundaries verified | Confirmed against your recorded plat or deed — not GIS or Google Maps. |
| 4 | All existing structures shown | Accurate footprints and clear labels (existing house, garage, shed, etc.). |
| 5 | Lot coverage calculated | Total built area ÷ lot area — must not exceed your zoning maximum. |
| 6 | All easements identified | Utility, drainage, and access easements from your title report or recorded plat. |
| 7 | Utility connections shown | Water, sewer, gas, and electric service entry points on the plan. |
| 8 | Drainage / grading included | Basic grading plan or drainage narrative attached where required by local ordinance. |
| 9 | NPDES addressed (if 1+ acre) | If project disturbs one or more acres, CGP coverage and SWPPP are required before construction. |
| 10 | Plan consistent with application | All footprints, dimensions, and project scope match across all submitted documents. |
Table 1: Checklist for veryfing permit before sending
If you want this checklist built into the plan itself, get your site plan for permits from a team that has delivered over 58,000 site plans across the U.S. – every one designed to meet permit submission requirements the first time.
The most frequent cause of permit rejection is a site plan that isn’t drawn to scale, or one that doesn’t clearly state the scale used. Missing property boundaries and unlabeled setback dimensions are the next most common causes.
Yes. Permit reviewers calculate lot coverage, the percentage of the parcel occupied by built surfaces, using the footprints of all structures on the property, both existing and proposed.
Federal EPA NPDES requirements apply when a project disturbs one acre or more of land, or is part of a larger plan of development that will disturb one or more acres in total. For qualifying projects, you must obtain coverage under the Construction General Permit (CGP) and prepare a Stormwater Pollution Prevention Plan (SWPPP) before construction begins. Refer to EPA’s NPDES Construction Activities page for current requirements.
Setback requirements are set by your local zoning ordinance and vary by zone, parcel type, and sometimes by the structure type being proposed. Your local building department or planning department is the authoritative source.

Permit approval starts with what’s on the page before you file and therefore most site plan rejections are preventable. The seven mistakes covered in this guide are all detectable before you file.
A professionally prepared site plan addresses each of these requirements as part of the drafting process, not as an afterthought. Whether you’re applying for a deck, an ADU, a home addition, or any residential project that requires a site plan, starting with an accurate, compliant drawing reduces resubmission risk significantly.
Get your site plan for permits — and submit with confidence the first time.

Land subdivision is the process of dividing a single piece of land into smaller parcels, or lots, that can be sold or developed individually. It’s a common practice in real

The answer on how much the site plan cost depends on one key decision – whether you need a non-certified drafting plan or a certified, stamped document from a licensed

Adding square footage is one of the most reliable ways to improve comfort, functionality, and long-term property value. Whether you’re considering a primary suite, a kitchen expansion, or building a