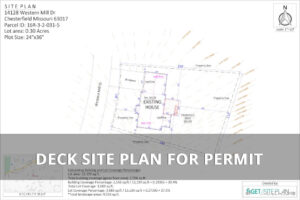
Deck Site Plan – Definition, Examples, Key Elements
Before a single board is cut or beam aligned, your deck begins with one essential drawing – the deck site plan. It’s the guiding layout that helps you organize your


Contributing Writer | Architecture & Design Writer
If you decide to get a site plan, but you are not sure what it is that you are going to get, look no further. We are going to list and explain each symbol that is going to be on your site plan. Also, if you have some additional questions regarding how to read a site plan, we offer some simple and easy to follow guidelines that will help you.
Table of Contents
ToggleWhat is on the site plan will vary. Many site plans contain lots of details, elements and symbols. Understanding all of them can be tricky. We will list them and go through them one by one, so you can learn everything you need to know about site plan symbols and how to read them.
Knowing how to read site plan symbols is an important skill for every project owner. If you understand what is on your site plan, you can play an active role in architectural site planning, ensuring that the final product is exactly what you want.
These are the symbols that will be on your site plan:
Now let’s see what each of these site plan symbols represent and what is their meaning and their importance in any type of architect drawing.

Address will be on your site plan. Legal information of your property – Parcel ID (APN#) and Lot Area are different from your address. It will be shown on the Site Plan under the Address of the property.

Paper size represent dimensions of the paper that you want to use when you print your Site Plan. In the title block Paper size information will be shown like 11”x17”, 24”x36” etc.

A vicinity map is a smaller map which will be included in your site plan. Vicinity map is a location map that shows the site of the proposed activity.
The site will be clearly marked and shown in relation to nearest major roads, cities and waterways in the area.

Each drawing is scaled. In this example, 1 inch on the site plan equals 40 feet on the field. This site plan scale will be located in the top right corner of your site plan, below the North arrow.

Every site plan will include a North arrow. This allows you to see how your property is oriented. The symbol that is depicted on the picture above will be located in the top right corner of your site plan. The arrow is indicating in which direction north is in the site plan.

Your property lines must be drawn on a site plan. Those are the boundaries of the site or lot. Property lines are legal boundaries that define where your lot, parcel or property begins and where it ends.
Property lines are important when you are buying or selling a property. Also, they are crucial if you are planning any additional architectural or landscaping work. Accidental appropriation of your neighbor’s lot or a public area can lead to disagreements and lawsuits.

The exact location of your driveway and adjacent streets will be on your site plan. They will be drawn and written on the site plan.
Also check this article: Do I Need a Permit for a Driveway? »

The site plan will show the existing structures, such as buildings, parking spaces, landscape, that are to be preserved. The location of the proposed structure will be shown, as well as its distance from the existing structures.

If you or anyone from your neighborhood has a well or a septic tank, those will be included in the site plan. The location of those objects and the distance to your proposed structure will be shown.

Setback is a minimal distance between your building, or other structures and streets or natural features. In other words, setback is a space that you have to leave between structures and your property boundaries. Depending on the jurisdiction, other parts of your property, like septic tanks, fences and landscaping can be regulated by the setback lines. Setbacks are set by the local planning department.

If there are any waterways on your property, like lakes, springs, ponds, those will be shown on your site plan. Their location and the distance to your proposed structure, or structures will be shown.

Topographical lines are contour lines showing the ground elevation in intervals between 2-10 feet, depending on GIS available data. Understanding how to read elevations on a site plan and comprehending topography can be very important for ground slope perception. Remember that every point on a topographical line (contour line) is at the same elevation.

Impervious surface calculation represents the percentage of impervious surface shall be calculated by dividing the surface area of existing and proposed impervious surfaces on the portion of a lot or parcel.

Simple tips for reading a site plan:
Now that you are familiar with everything you have to know about site plan symbols and how to read them, you can look at some site plan examples to get an even better idea about site plans.
Learning how to read a plot plan is a bit easier, so you can take a look at our article and find out.
Credits:
Learn more about our contributor:

Contributing Writer | Architecture & Design Writer
During my career, I’ve written articles on interior design, home remodeling, and renovation with an emphasis on money-saving tips and DIY ideas. It’s been a rewarding journey and I am thrilled to continue helping others bring their architectural visions to life.

Before a single board is cut or beam aligned, your deck begins with one essential drawing – the deck site plan. It’s the guiding layout that helps you organize your

If you’re a property owner planning to build, make improvements, or divide your land, one of the first things you’ll need is a subdivision site plan. However, navigating the process

A porch is one of the most versatile and inviting parts of a home. It’s where curb appeal meets comfort, providing a place to welcome guests, relax with family, or